
One Step at a Time with Thoughtful Branches

I can't believe how amazing the Thoughtful Branches bundle is!  This is my first play with this set, and I just love how my card turned out.


I made this card with the #frommetoyouwhenyourefeelingblu movement Petra Tailor from the Crazy Crafters has started - it is such a wonderful idea to make and send a handmade card to someone you how is having a difficult time. After all, some days all of us need to take things one step at a time to get to the end of the day, and it is amazing how even a thoughtful comment from a total stranger can help us get through these days; so just image how the surprise of receiving a handmade card can make someone you care about feel makes you feel.

My colour inspiration came from a trip to Mt Lofty in the Adelaide Hills a few months ago, the beautiful autumn colours just look amazing when stamped with this new set.


See details below for more information about this amazing limited time bundle!

Thanks for visiting today, I hope you enjoyed viewing my project.  I would love to update you when I create a post! If you would like to receive an email from me when I do Click Here. You can also subscribe for my newsletter for Stampin' Up news, updates and Sales. 
 

But wait there is more exciting news!


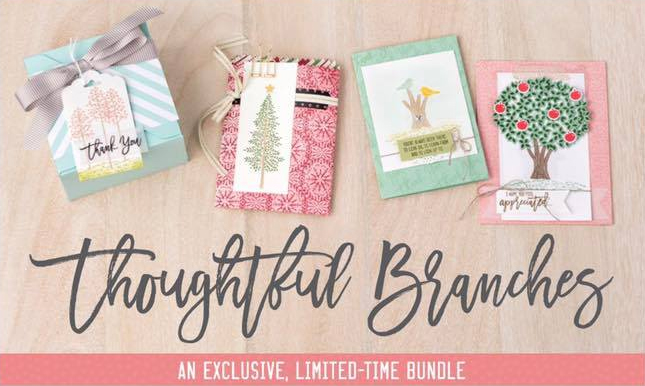
This amazing bundle will be available to purchase in August... but if you can't wait and would like to order it now you can! Here's how:

By joining my team and getting the Stampin' Up!® Starter kit you can add this stunning bundle to your starter kit right away! The starter kit is $169 and allows you to order $235 of ANY current Stampin' Up!® product including this special limited -time bundle. So if you can't wait for August.... I would LOVE to welcome you to my team.  JOIN NOW


When shopping  remember to use the current Hostess code displayed at the top of my blog at the check out and you will be eligible for a Thank You gift for for shopping with me  - Learn more here - be sure to click YES that you allow me as your demonstrator to contact you in your account settings otherwise I won't be able to forward your Thank You gift. 

Comments

  1. Such a beautiful card, Sue. The leaf colours look amazing & great layout too. Love & pinned! Thanks for sharing.
    Di :)

    ReplyDelete
    Replies
    1. Thank Di, I just love this set with the mix of stamps and dies, oh the possibities

      Delete
  2. Beautifully designed card Sue. I love your colour combo.

    ReplyDelete
  3. Just absolutely stunning Sue. You have so much talent to share and what a perfect way to show it but making someones day better. Thank you for taking part in our international blog highlight and making it such a success! xx

    ReplyDelete
    Replies
    1. Thank you for hosting this event, it is such a good cause. Making someone's day not only make them feel better, it also puts a smile on my face :)

      Delete
  4. This is so pretty - I love how you stamped the leaves and as fall is my favorite season I am really drawn to the colors on your card!

    ReplyDelete
    Replies
    1. I'm not usually an orange girl, but when you bring Autumn/fall theme into the mix they are just amazing

      Delete
  5. So gorgeous! Thanks for sharing xxx

    ReplyDelete
    Replies
    1. This is such a great movement Petra, I had to make a card to fit.

      Delete
  6. Very, very pretty. Love your color choices.

    ReplyDelete
  7. Very, very pretty. Love your color choices.

    ReplyDelete
  8. I love the multicolored leaves. They look great!

    ReplyDelete
  9. Sue this card is a winner. the most beautiful I have seen. you sold me the bundle. love it . x Bibi

    ReplyDelete
    Replies
    1. wow thank you Bibi, I so admire your designs, your comment means so much to me xx

      Delete
  10. THIS IS GORGEOUS!!!! THANK YOU SOOO VERY MUCH FOR POSTING! I'm going to make this as my Thanksgiving Card this year!!!!!! ❤️❤️❤️❤️💕💕💕💕❣❣❣❣🍁🍁🍁🍁🍂🍂🍂🍂🎃🎃🎃🎃

    ReplyDelete
    Replies
    1. thank you so much, for you kind words - love that I have given you inspiration

      Delete
  11. Can you share how you colored the leaves????

    ReplyDelete
    Replies
    1. The colours are shown on the ink pads, Daffodil Delight, Pumpkin Pie, Old Olive and Soft Suede :)

      Delete
    2. Did you use the baby wipe technique to stamp the leaves?

      Delete
    3. I used sponge daubers to apply the different colours on the leaves then stamped. I found working with the lightest colour first, or from the centre out to the edge worked best

      Delete

Post a Comment

Thanks for taking the time to write a comment - you have made my day!

Popular posts from this blog

Thank you for everything Hues of Happiness

Hello crafty friends, I'm using one of my favourite layouts today with the simply gorgeous Hues of Happiness DSP . I decided to make the card using Pool Party cardstock to complement the blue flowers in a bed of purples, I think it turned out lovely. I added detail to the card front by using the Scalloped edge from the Scalloped Contours Dies , and heat embossed a sentiment in silver from the Color & Contour stamp set .  To finish I added a touch of bling with Rhinestone  Basic Jewels . Thanks for visiting today, I hope you enjoyed viewing my project. Stay tuned for more inspiration and tips this month. I’ve listed the products I used below, just click on the picture and be taken directly to the product.  I truly appreciate your support, it inspires me to keep crafting and helps to keep my blog and YouTube channel running. If you live in Australia and don't already have a Demonstrator I'd love to be yours.  Hues of Happiness DSP Scalloped Contour Dies   Color & Cont

Fancy Folds Stampers Showcase - Hues of Happiness Circle Easel Card

Hello there crafters! You are going to love today's Stamper Showcase Blog Hop - we are all featuring FUN FOLDS, I just love a fun fold, I should really do more of them! I decided to a Circle Easel Card, it's a smaller card, but I think you will agree is just super cute, and with the Hues of Happiness DSP is just Gorgeous! This card is a relatively simple for a fun fold and comes together very quickly - I think I spent more time doing the floral arrangement than the actual fun fold itself. I took advantage of being able to die cut images directly from the Hues of Happiness DSP - I love it when we can do this with DSP, and aren't the flowers just stunning! I took 3 different flowers and some foliage and arranged to fit within the Basic White Circle cut from the largest circle die in Layering Circles Dies set, and the largest scallop die is used for the coloured section of the card. To create the card base you need to fold a piece of card stock and positon the largest die slig

All Star Fancy Flora Video Class Bundle

Hello crafters, a new month, means a new bundle from the All Star Design Team. This month we are showcasing the  Fancy Flora suite  from the Jan-Apr 2023 Mini Catalogue. The All Star Tutorial Design Team not only design a Tutorial Project that’s exclusive but we also each design an additional project to share here for further inspiration. I've used the  Two Tone Flora bundle and Something Fancy bundle  in my design today, with the background stenciled using Blending Brushes with one of the Artistic Mix Decorative Masks .  The flowers are arranged over 3 die cuts using the largest scalloped tag die from the Something Fancy Bundle, and I've used the coordinating dies from the Two-Tone Floral bundle to die cut the flowers and leaves. This card all about Polished Pink, but as you can see there are different shades - the background fades in and out by using the Blending Brushes, and the flowers use both 1st generation stamping (for the detail stamping, and 2nd generation for the s

Color Fusers Blog Hop July 2022

Hello crafters, welcome to this month's Color Fusers Monthly Blog Hop! This month, our colors include Petal Pink, Poppy Parade & Smoky Slate. Now, Poppy Parade isn't a colour that I use much, its quite bright and I'm more a pastel kinda gal. That got me thinking, and I decided to water colour flowers because then I could control how deep or pastel to make Poppy Parade. I started by stamping the flowers and leaves from the Happiness Abounds Bundle onto a piece of Shimmery White Cardstock , covered with Silver Stampin’ Emboss Powder and heat set. To add colour I first flooded a little water using the mid size Water Painter to the centres of the flowers and where I wanted the colour to be darker, then using the smallest Water Painter I picked up colour from my Poppy Parade ink pad and added to the water, then left to dry. When dry or almost dry I repeated the process to fill the remainder of the flower with Petal Pink, to later cut with the coordinating Blossoming Happi

Awash with Beauty with the All Star Tutorial Team

Hello crafters, a new month, means a new All Star Tutorial. This month we are showcasing the  Awash with Beauty suite  from the Jan-June 2022 Mini Catalogue. The All Star Tutorial Design Team not only design a Tutorial Project that’s exclusive but we also each design an additional project to share here for further inspiration. I've made the gorgeous Awash in Beauty DSP and dies a focus for my project today. I placed an adhesive sheet on the cardstock before cutting the lattice, making is easy to adhere to the pretty blue DSP background. I used the dies to cut images directly from the DSP, as well as a little piece of Basic White foliage in my floral arrangement. I used one of the dies from the Fabulous Frames die set for the focal point, adding a layer of vellum in the "window" before arranging the die cut flowers. I finished by adding the sentiment strip, twine and Iridescent Pearls for a touch of bling. Awash with Beauty Inspiration Below is a sneak peek of what’s in