
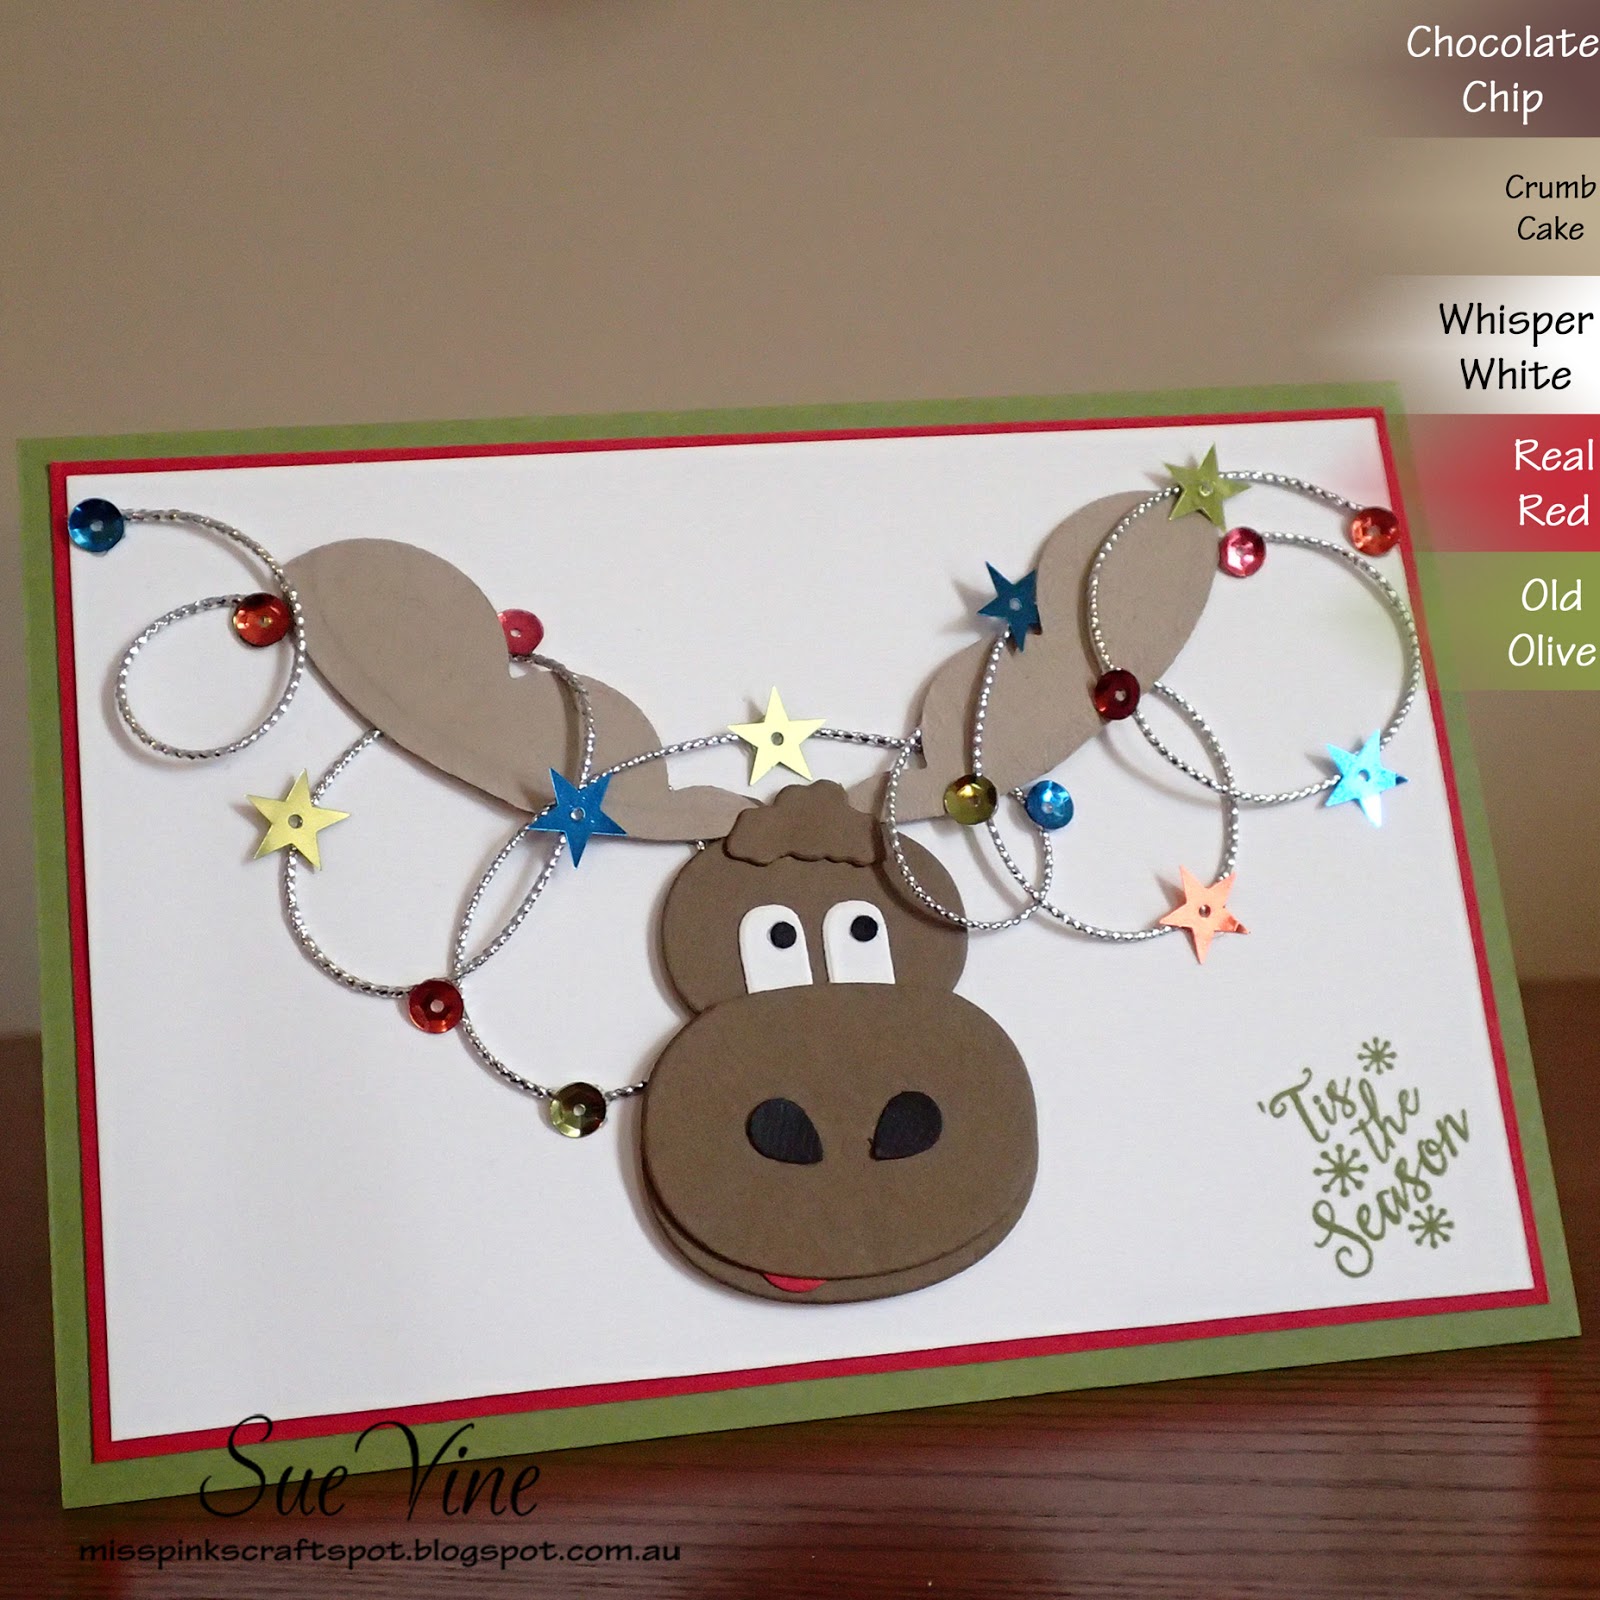
I have had the amazing honour of being ask to be a guest designer this week with the team from Merry Monday! Here is my card:


Below is Nina's theme for this weeks challenge:

I don't have a moose stamp, so I thought I would give punch art a try, or a variation of punch art as I also used framelits:
 The moose head, antlers and eyes are made from framelits in the Snow Friends set, I also used an oval die to round the bottom edge of the antlers. The end of the candy cane was used for the white of the eyes and the holly framelit for the tuft of hair.
Thank you for stopping by today, and for your wonderful encouraging comments, til next time,
For those that live in Australia - you can go shopping for all of your supplies to make this card at my online store. Just click on the pictures below to add them to your shopping cart. If you use the Hostess code displayed at the top of my blog when you check out, any order with a minimum spend of $50 will receive a sample pack of paper as a Thank You for shopping with me.


Below is Nina's theme for this weeks challenge:

I don't have a moose stamp, so I thought I would give punch art a try, or a variation of punch art as I also used framelits:
 The moose head, antlers and eyes are made from framelits in the Snow Friends set, I also used an oval die to round the bottom edge of the antlers. The end of the candy cane was used for the white of the eyes and the holly framelit for the tuft of hair.
I used the Tree builder punch for the nostrils and tongue, and the small circle from the Owl punch for the eye balls.
Sequins attached to Cording trim make up the Christmas lights that my poor Moose is tangled in!
The sentiment is from Peaceful Pines.
Thank you for stopping by today, and for your wonderful encouraging comments, til next time,
For those that live in Australia - you can go shopping for all of your supplies to make this card at my online store. Just click on the pictures below to add them to your shopping cart. If you use the Hostess code displayed at the top of my blog when you check out, any order with a minimum spend of $50 will receive a sample pack of paper as a Thank You for shopping with me.
How adorable is your punched art moose!!?? He is just the cutest, Sue! Congrats on your win and for being our Guest Designer this week....your card rocks! Hope you have a wonderful week! :)
ReplyDeleteYou totally nailed the punch art moose!! Awesome job!!! Love the string of lights in his antlers too!!! So great having you join us as Guest Designer this week!!!
ReplyDeleteVery clever and cute card. Great job.
ReplyDeleteVery clever and cute card. Great job.
ReplyDeleteOMG what a totally fun card! Love how you decorated the moose.
ReplyDeleteI love how creative you were with your card! Punch art is amazing and you did a great job! So happy to have you as our guest this week!
ReplyDeleteYour moose is very adorable! Thanks for being our guest designer this week!
ReplyDeleteThis is so clever and amazing, Sue! I love this fun moose with his tangle of lights! Thanks so much for joining our team this week!
ReplyDeleteSo cute and creative, Sue. Thanks for being our GD this week. Great job.
ReplyDeleteOh that's so adorable!! Well done Sue!
ReplyDeletehaha so funny! Great card!
ReplyDeleteOMG this is too stinking clever and cute! I love how you strung lights around his rack!
ReplyDeleteSo glad you could join us as guest designer this week Sue, your card is so fun and I love your creative punch art moose.
ReplyDeleteSue, your moose is just darling!! Thanks so much for being our Guest Designer this week!
ReplyDeleteWow - absolutely love your sweet moose! So clever how you constructed him! Congrats on being Guest Designer on Merry Monday!!
ReplyDeleteCongrats on being guest designer - you made a fantastic card!!! I love the punch art moose - so adorable!!
ReplyDeleteVery creative design Sue, love how you created your Moose and added the Christmas Lights. Thanks for being our Guest Designer this week at Merry Monday, well deserved.
ReplyDeleteOh he is just perfect! Love the lights on him too!
ReplyDeleteDeanne :)