
It's that time again, the Ink it! Stamp it team is back to share creations and inspiration with you, this month we all have a technique to share with you.
My project started out with me going to share colour blending with water pencils, and then I also ended up with fussy cut layers, a 2nd technique for you!


I've used 3 new exciting limited edition products for my project:


- Blended Seasons Stamp Set
- Stitched Seasons Framelits
- Water colour pencils - 10 new colours
Continuing with my DSP personal challenge I've used the wood grain pattern from Natures Poem for my background, now for the fun... how gorgeous is that stitched framelit, there are 3 different sizes in the framelit pack and they cut with stitching on both sides of the cut too, they are WOW to say the least!
Now the 2nd lot of fun, the gorgeous floral arrangement. I started by stamping the image, then coloured with Flirty Flamingo, and a touch of Cherry Cobbler at the base, then "melted" and blended the colours together with a Blender Pen - I say melted as it's the best way I can describe how the pencil strokes change when you apply the pen. I repeated the process with the leaves using Granny Apple Green and Garden Green. I used the original Daffodil Delight in the centre of the flowers. Next I cut the arrangement, but it need something else - I decided to stamp a 2nd and colour the flowers again and fussy cut so that I could add height and depth to the arrangement, then added Wink of Stella to give the a shimmery shine.
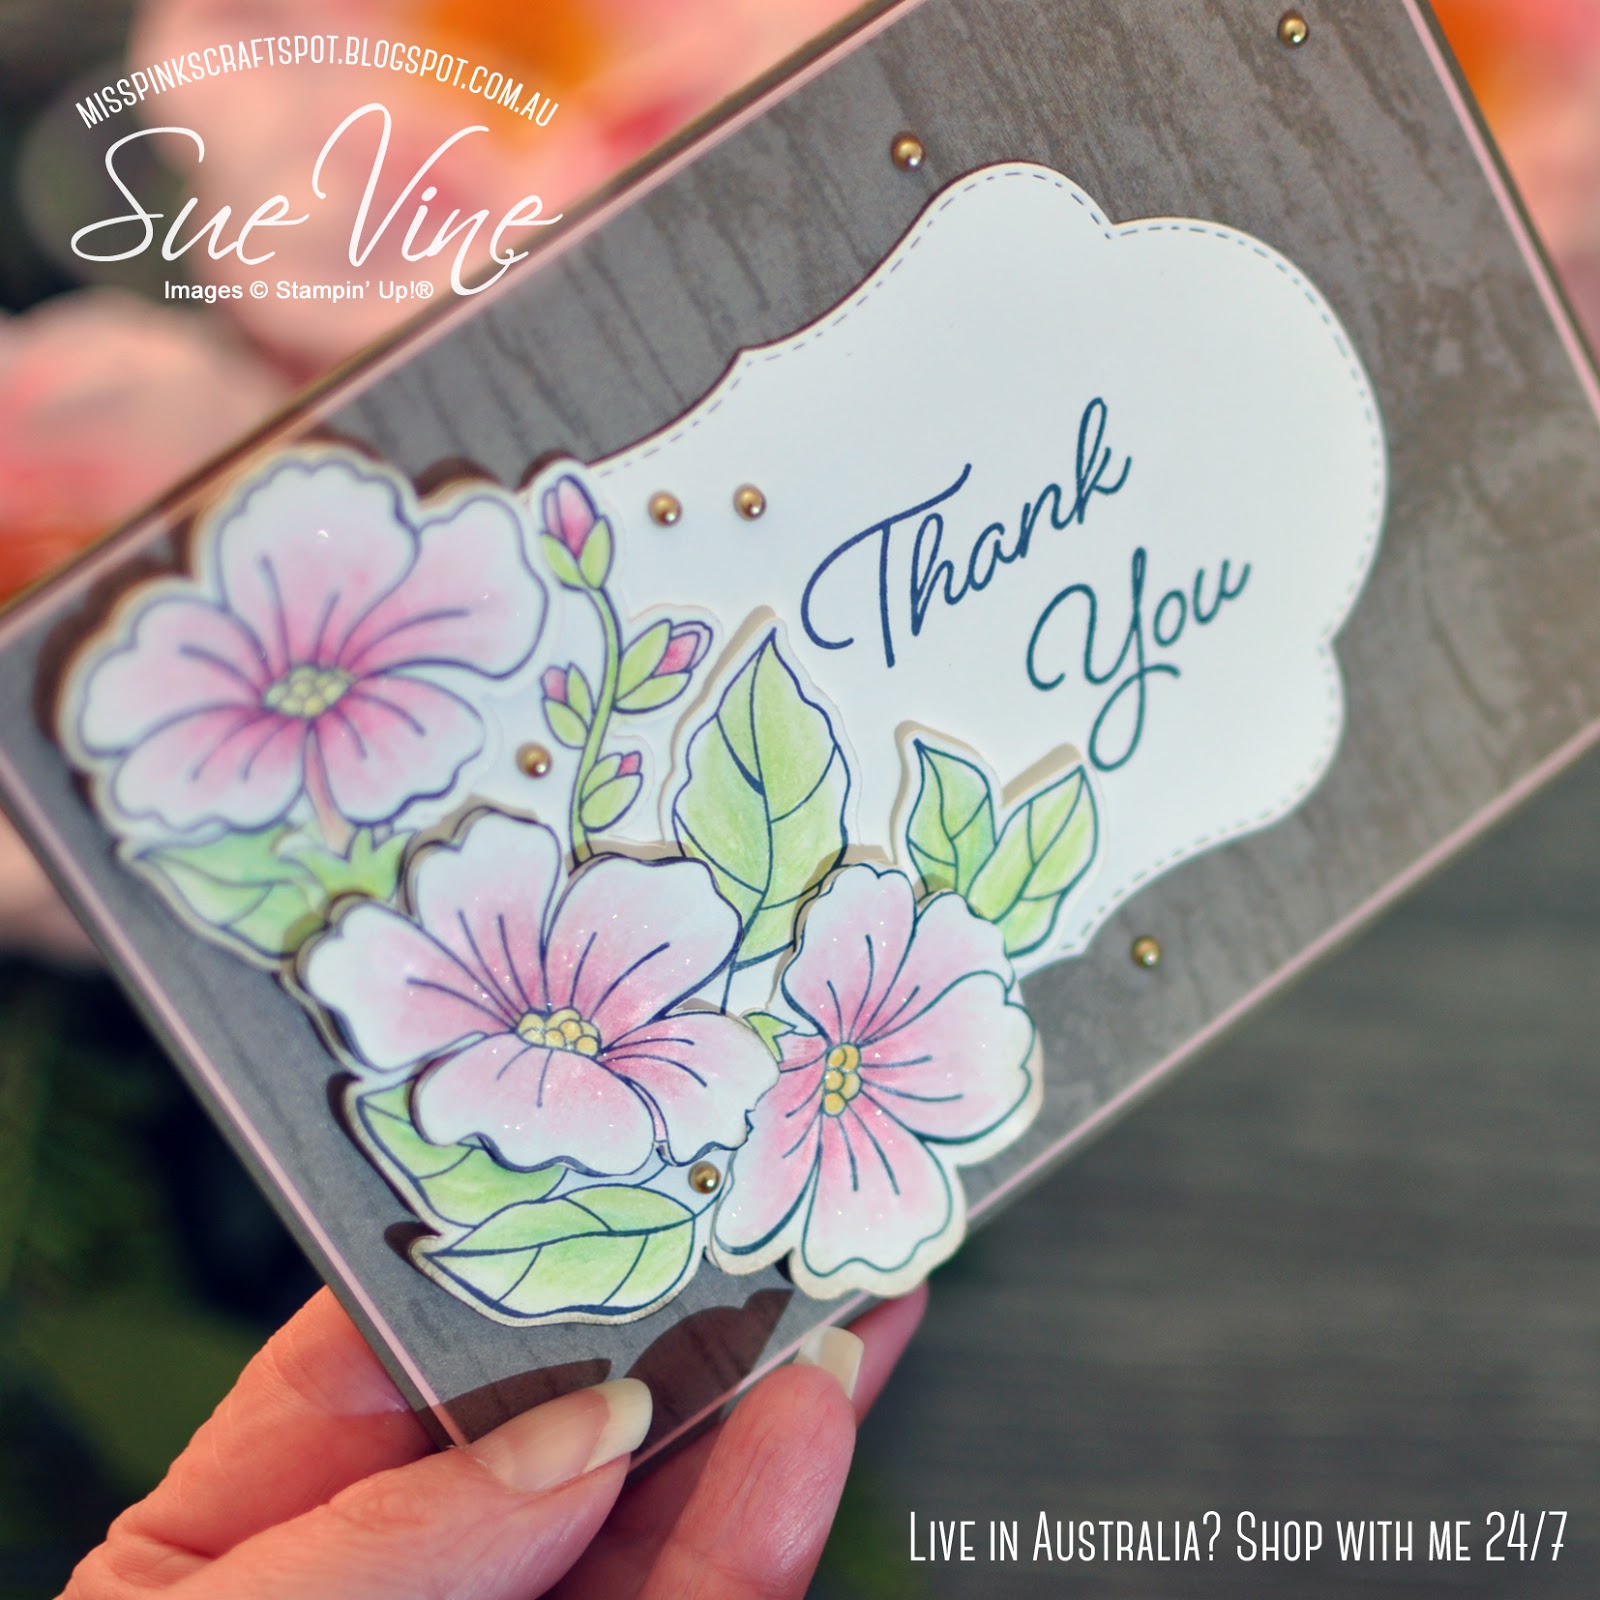

My tip when using a Blender Pen is to use in one motion - I worked from the centre of the flower to the egde, and regularly clean your pen off on a scrap piece of paper. Don't work one area too much when it is wet as your card stock may "peel".
Tip 2 - fussy cutting, you can just see the original stamp under the top layer of flower, go around the edge of your cut with a marker or dauber to remove any "crisp white" from your cut.
Oh what do you know... I used a 3rd technique! I mask the sentiment so that I could stamp it on 2 lines instead of one - masking would have to be one of my most frequently used techniques, it can change the layout of sentiments, and also enables you to create your own layered images.


Be sure to visit all the team and see their wonderful creations and tips they have to share, you are currently visiting Sue Vine - Miss Pinks Craft Spot, to keep hopping around see the list below to see who is up next.
Thanks for visiting today, I hope you enjoyed viewing my project. Stay tuned for more projects using Designer Series paper this month. If you live in Australia and don't already have a demonstrator I'd love love to be yours- why not take advantage of the Buy 3 Get 1 Free promotion and create with me?
Thanks for visiting today, I hope you enjoyed viewing my project. Stay tuned for more projects using Designer Series paper this month. If you live in Australia and don't already have a demonstrator I'd love love to be yours- why not take advantage of the Buy 3 Get 1 Free promotion and create with me?

The Blended Seasons Stamp Set is available for a limited time.

Want to get your hands on Blended Seasons now?...you can by joining now, otherwise shop with me on August 1st and get your hands on this beautiful bundle!

Want to get your hands on Blended Seasons now?...you can by joining now, otherwise shop with me on August 1st and get your hands on this beautiful bundle!
Did you know....
now is GREAT time to join Stampin' Up! Pick $235 of any products from the catalogue (including the Blended Season Bundle and/or new watercolour pencils) in your starter kit for $169, and
now is GREAT time to join Stampin' Up! Pick $235 of any products from the catalogue (including the Blended Season Bundle and/or new watercolour pencils) in your starter kit for $169, and
choose an Ink Pad Family for FREE too!
(valued at $117)
(valued at $117)
And enjoy 20% discount on future purchases = more crafting supplies for less $$$ - such an amazing offer, too good to miss! I would LOVE to welcome you to my team - Ink Obsession, why not JOIN NOW


When shopping remember to use the current Hostess code displayed at the top of my blog at the check out and you will be eligible for a Thank You gift for for shopping with me - Learn more here - be sure to click YES that you allow me as your demonstrator to contact you in your account settings otherwise I won't be able to forward your Thank You gift.


Soooo delicate and pretty! Someone else who loves the new Blended Seasons!
ReplyDeleteReally nice card and, once again, good tips on techniques. Thank you so much for sharing.
ReplyDeleteIt’s a beauty, Sue!
ReplyDeleteYour card is lovely. Thanks for the blending tip too.
ReplyDeleteYou make it look so easy! Beautiful card and thank you for your tips I will continue to practice and perfect my colouring!
ReplyDeleteThank you!!! Every single stop was a learning experience! I appreciate all of you so much.
ReplyDeleteAbsolutely stunning! I love the woodgrain background and your flowers are gorgeous! :)
ReplyDeleteGorgeous Sue! Perfect colouring and I love how you've layered the flowers, makes them jump off the card.
ReplyDeleteGreat techniques Sue and a beautiful card x
ReplyDelete